The Beef Wellington Recipe of Champions!

The Beef Wellington Recipe of Champions!

When I cook, I always aim for maximum deliciousness and flavor. As a beef lover, one of my favourite dishes to prepare on the BBQ (and to enjoy, of course) is oh-so-comforting Beef Wellington. I like to treat my family with this dish after we’ve spent the whole day outside playing catch and running around.

Now I know tenderloin is not the most flavourful cut of beef BUT… sear it, season it well, give it a bit of love, and you’re in business. Trust me, the way this recipe combines a tender and juicy piece of meat with a mixture of vegetables and a crispy (and buttery!) puff pastry results in a Beef Wellington that’s hard to top, taste-wise. I have to restrain myself, or there won’t be any left for my wife and kids!

Believe me, this recipe is a lot easier to do than it seems. Ready? Let’s go!


Ingredients

  • 1 (2 lb) beef tenderloin
  • 1 package store-bought puff pastry (or make your own!)
  • 4-5 white mushrooms
  • 1 carrot
  • ¼ cup of your favourite herbs (optional)
  • Montreal spice mix, such as House of BBQ Experts’ Montreal Spice Mix and Rub, to taste
  • 3 tbsp good quality mustard
  • ½ cup of your favourite gravy or sauce
  • 1 egg, beaten


Cooking Method

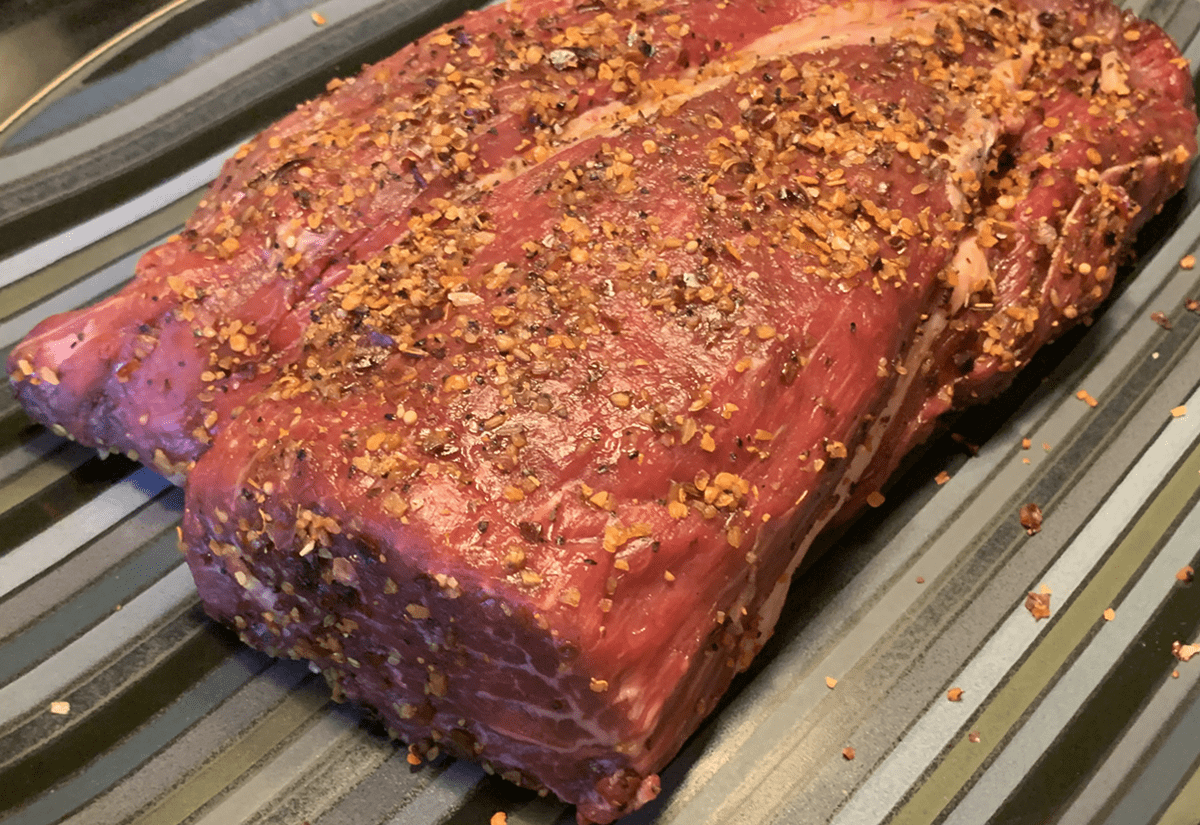
  1. Season the beef tenderloin to taste with the Montreal spice mix and rub. (The more seasoning you put on, the more flavours the tenderloin will pack.????)
  2. Sear the piece of meat on the BBQ for 2 minutes on each side at a very high temperature. Remove it from the heat and let it rest for 1 hour.
  3. While you wait, place the mushrooms, carrot and herbs in a food processor, and chop everything into small pieces. Transfer the vegetables into a bowl and set them aside.
  4. Preheat the BBQ to 350°F.
  5. Using a rolling pin, roll out the puff pastry into a rectangle that’s large enough to envelop the beef tenderloin.
  6. Spread the mustard and chopped vegetables on the puff pastry.
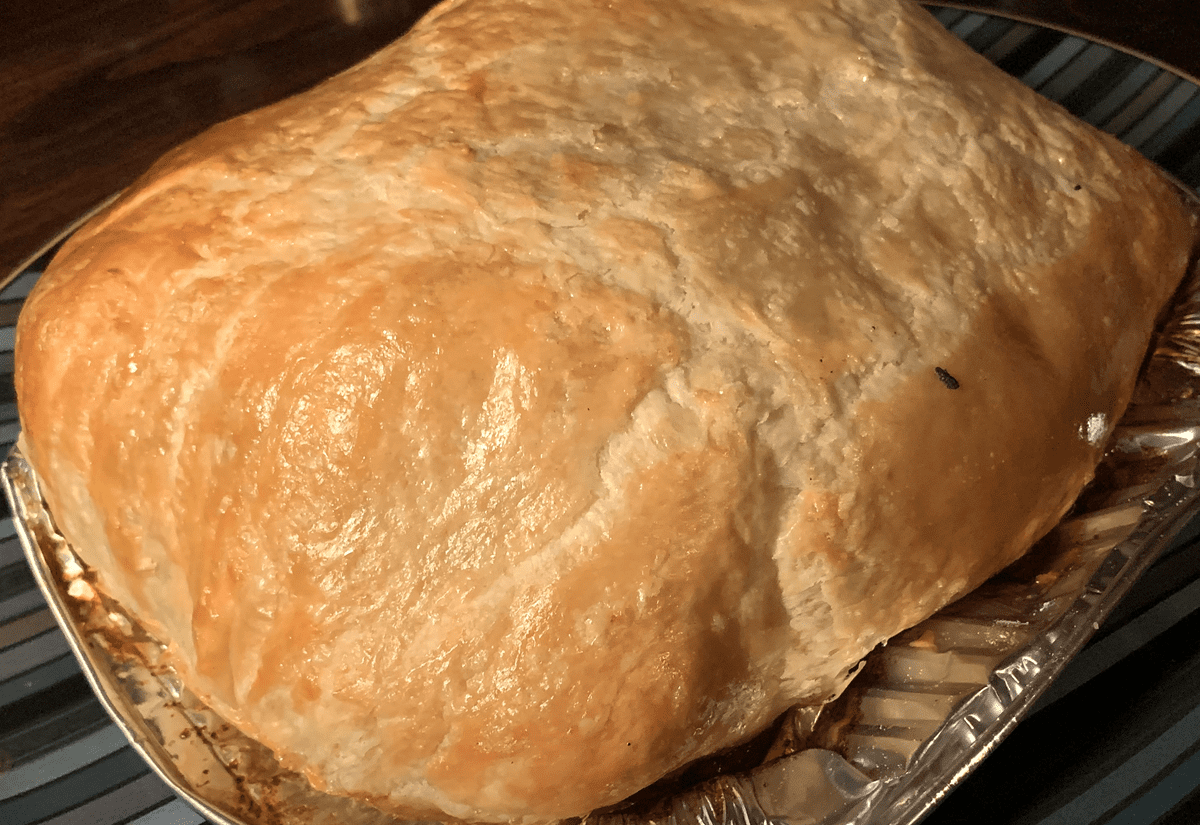
  7. Once that is done, place the beef tenderloin in the center of the puff pastry, wrap the puff pastry around it, and brush the dough with beaten egg.
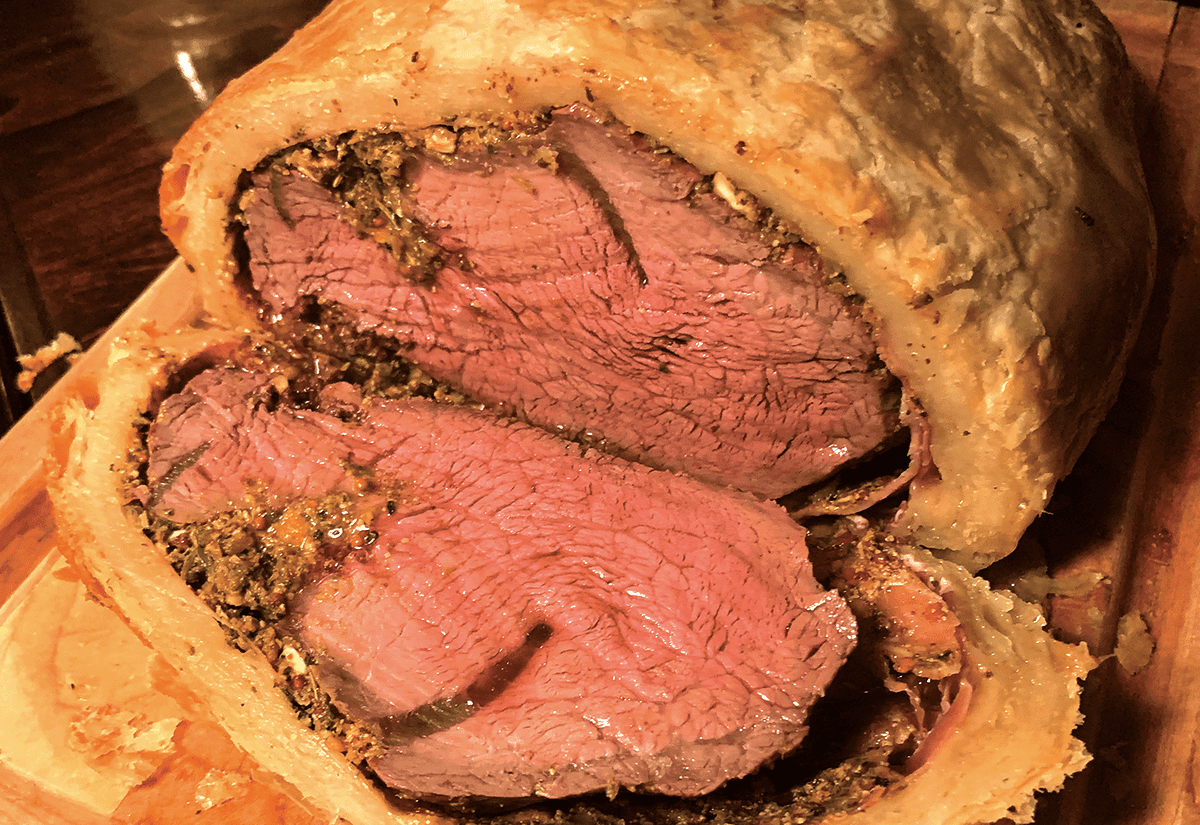
  8. Place the wrapped beef tenderloin into a barbecue-safe dish; place the dish onto the BBQ and let it cook in an indirect cooking zone until the internal temperature of the meat reaches 145°F. After that, let it rest for a few minutes outside the BBQ.
  9. Heat up the gravy or sauce and drizzle it over the Beef Wellington.
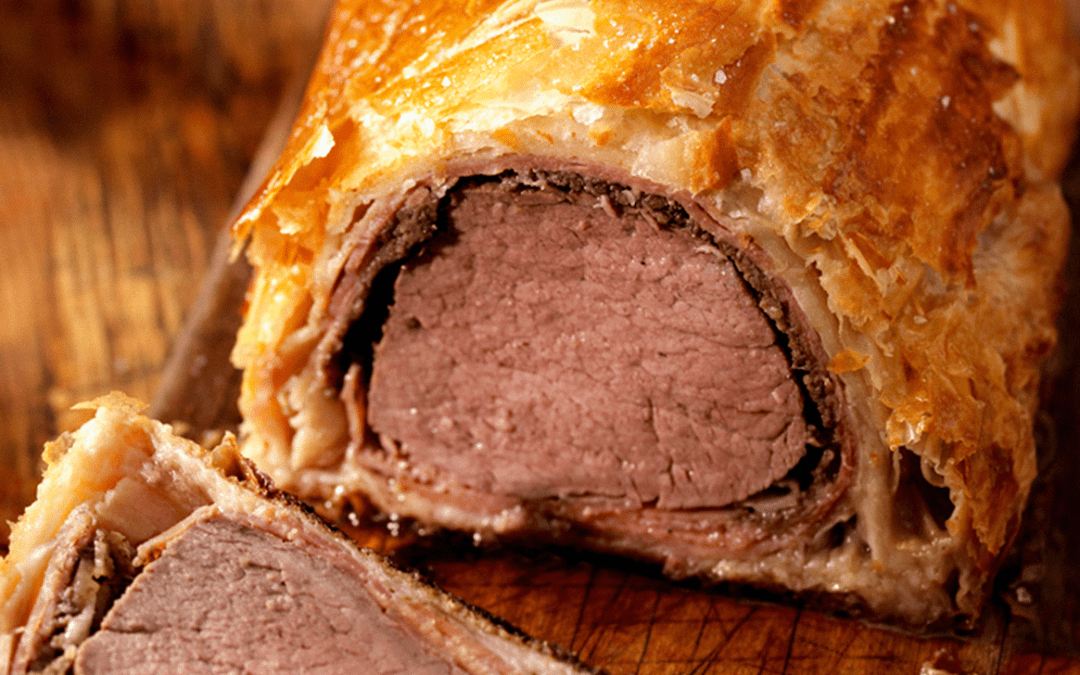
  10. Serve and enjoy the explosion of flavors it creates in your mouth!


Have fun BBQing everyone!

Editor’s note: We made this Beef Wellington ourselves and itwas just as easy and fun to make – and as delicious to eat – as Max promises! Here are pics of the result.

Baking On The BBQ

Baking On The BBQ

Now more than ever, cooking and baking have been bringing joy to Canadians. Creating new things in the kitchen has provided entertainment and comfort throughout the past year.  Spring is here and it’s time to take the fun outside. Your grill can offer some creative methods for making fabulous baked desserts the whole family will love, and as a bonus, you won’t have to heat your oven or your home to get that delicious result.

We went to the experts on this one and checked in with Kyla Kennaley, Pastry Chef and Judge: The Great Canadian Baking Show Season 3 & 4, to ask our most burning questions when it comes to baking on the barbecue.

Why bake on the barbecue?

“Well, it’s cooler to cook on a barbecue than in a hot kitchen, which can be especially important in summer. The grill allows for controlled heat, and you can create a convection current by heating the grill to temperature, turning off one side of the burners, and baking on that side. This can be a huge advantage! Start by experimenting with drop cookies when you’re ready to bake, as it’s easier to learn how to control your baking with cookies before moving on to cakes and pies. Remember, even heat is the key to success when baking on the barbecue!”

What are some of the advantages of using a barbecue?

“A barbecue heats up faster than your oven, and a convection current bakes more evenly and cooks more quickly than an electric radiant heat oven. The heat factor can be particularly helpful, especially for holidays, as it frees up your oven to cook your turkey or roast beef with the drippings in the pan. Otherwise, you can always reheat the meat on the barbecue after resting it for an added barbecue smoky taste.

Baking on the barbecue allows you to entertain your guests and enjoy the great outdoors while you’re preparing dessert. Try baking a cake, brownies or bread pudding in a cast iron pan baked right on the grill – it produces a nice crispy edge, and you can use your side burner to make a creme anglaise at the same time.

And lastly, the barbecue adds a smokiness that is essential to any great grilled meal or baked barbecue treat.”

Charcoal vs Gas?

“Gas is controlled even heat and popular in most homes and apartments. However, charcoal is also an excellent option for cooking and baking, and can produce similar results to a gas grill.” 

Favourite Barbecue Tools?

“I would suggest two essential tools for any serious griller: heavy oven mitts with long sleeves for excellent protection while working with the high heat of the barbecue, and a few good quality cast iron pans in multiple sizes so you always have what you need when the grilling mood strikes.”


This great advice is the perfect place to start if you are interested in baking on the barbecue at home. If you’re feeling inspired, consider trying out this cheesecake recipe from Maxim Lavoie, BBQ Guru, House of BBQ Experts. This cheesecake is delicious to eat as an afternoon snack or as a breakfast treat the next day, and the whole family can enjoy this cheesecake together. Maxim’s added words of advice: hide a piece for yourself; the cake won’t be there for long!

House of BBQ Experts Grilled Cheesecake


Ingredients

For the crust:

  • ½ cup graham crumbs
  • 1 tablespoon brown sugar
  • ¼ teaspoon salt
  • ¼ teaspoon freshly grated ginger
  • 2 tablespoons Baking Spice Blend, such as House of BBQ Experts’ Cake spice mix
  • 2 tablespoons melted butter

For the filling:

  • 375g cream cheese (1½ packages)
  • ½ cup white sugar
  • 2 eggs
  • 1 teaspoon vanilla extract

Suggestions for topping:

  • Fresh berries or fresh fruit slices
  • Caramel topping
  • Fruit compote
  • Chocolate shavings
  • Whipped cream

Cooking Method

  • Preheat the BBQ to 325 °F.
  • In a small bowl, mix all the ingredients for the crust. Press the mixture into the bottom of a barbecue-safe dish – make sure the crust is approximately 1cm thick
  • In a large bowl, beat the cream cheese, white sugar, and vanilla extract until smooth. Add the eggs, one at a time, and beat on low speed after each addition, until your filling is well blended. Pour filling into the crust.
  • Bake over indirect heat on the BBQ for 20 to 25 minutes with the lid closed. After 20 minutes have passed, you may peek. Similar to baking in a conventional oven, to ensure the filling does not get overcooked, stick a toothpick in the center of the cheesecake. If it comes out clean, it is fully baked.
  • When baking is done, let the dish cool and then refrigerate for 6 hours.
  • Once the resting time is over, top as desired, serve and enjoy!

Max’s Pro Tip

“While waiting, prep a piece of meat for dinner. A low and slow BBQ recipe will keep the BBQ going all day, filling the air with an amazing smell and serving as a warming station at the same time. Truly, there is no better way to enjoy being outside!


Winterizing Your Barbecue

Winterizing Your Barbecue

Many of us enjoy grilling outdoors year round, but for some of us, the grilling season comes to an end when temperatures drop below freezing. If you don’t plan to grill during the winter, we recommend “winterizing” your grill. Properly caring for it during the winter months will ensure your appliance will be in good working order next season.

Cleaning the Grill

Apply non-stick spray on the grates before lighting the grill; the protective spray cuts down the clean-up time afterwards. Heat for about 15 minutes, turn off the grill and allow it to cool. If you have a charcoal grill, line the bowl with aluminum foil. After heating, and once the grill and coals are cool, discard the foil with the coals and ash.

Once the grill has cooled, use a wire brush or even crumbled aluminum foil to scrub away buildup on the grates, and discard any grease from the grease tray. Spray grease-cutting dishwashing detergent on grill and grates, scrub with brush or abrasive pad, then rinse. A repeat may be necessary.

Clean the outside of the grill, using a good stainless steel cleaner; it’s important to scrub and polish in the direction of the grain. Make sure all dirt is removed, which can get trapped in the grain.

Covering the Grill

Invest in a good cover for your appliance; this is especially important if you plan on keeping it outside. Prolonged exposure to the elements can shorten the life of your grill, no matter how high quality it is. Grill covers are a good investment, when you compare their relatively low cost to the price of replacing your grill.

Cover once the barbecue is cool and dry.

Storing the Grill

If you won’t be using your barbecue during the winter, unplug your gas from the wall or remove your propane tank. If you have space, we recommend storing the barbecue in your garage or under a covered part of your patio. It is not safe to store propane tanks in the garage; store them outside, off of the ground, and cover.

If you have cast iron grates, it’s best to bring them inside. Temperature changes can cause them to crack, and moisture in the air can cause them to rust. It’s a good idea to season them before you put them away.

Preparing Your Outdoor Living Space for Winter

It’s also important to prepare and protect the rest of your appliances and equipment, so that everything is ready to use in the spring.

Keep brick oven and fireplace doors closed and cover fire pit openings to prevent snow and ice from building up inside the unit. If snow or ice does build up on a fireplace, fire pit or brick oven, be careful to remove any loose snow or ice, warm the unit up and thaw it slowly.

It’s important to protect your pipes, so shut off water to your outdoor kitchen and drain all water lines. Leave the drain valves open.

Turn off all of the power to appliances. Clean the inside of appliances and cabinets and wipe everything down to remove residual moisture. Do not cover outdoor refrigerators or ice makers, which could cause moisture to get trapped and cause electrical damage.

Cover any sinks to prevent debris from settling in the basin. You may want to consider removing the faucet and storing it indoors. If counter tops are made of stone, consider applying a sealant to prevent leaf stains or cracks caused by freezing moisture.

Professional Landscaping: Designing Your Outdoor Living Space

Professional Landscaping: Designing Your Outdoor Living Space

It’s finally time to prepare your outdoor living space! Planning remains the key to avoiding costly mistakes and ensuring all your outdoor space wishes are realized. A professional landscaper is an important part of the design process to consider. With the help of a professional, landscaping transforms your outdoor living environment. A professional landscaper knows how to create dynamic and sustainable spaces that will enhance your quality of life, increase the value of your home and provide you with great satisfaction for a long time. Before contacting a professional landscaper, we advise you to plan your project by following the following steps.
Step 1: Set your goals
  • Are you interested in developing a single area on your property or do you want to transform several spaces? If the plan concerns several areas, which are the priorities?
  • Apart from the aesthetic aspect, how important is the functionality of the space? Are you aiming for maximum use of the premises?
  • Do you want your new garden to provide more security, more privacy, or greater ease of access?
  • Which style do you prefer: natural, urban, formal, informal, etc.?
  • What elements already exist in the places you want to keep, such as trees, rocks, streams, landscaping, etc.?
  • Is there a view you would like to keep, improve or hide?
  • Do you want to develop a plan or do you already have one? What are your design preferences, such as colours, types of materials, choice of plants, etc.?
  • What are your expectations for maintenance? Do you expect to spend a lot of time there, or do you prefer a low-maintenance layout?
Step 2: Identify the elements you want to be a part of your space
  • Cooking, dining, entertainment and relaxation areas
  • Barbecues, firepits, and outdoor fireplaces and heaters
  • Pools, spas, or other water features, such as waterfalls or ponds
  • Trails and walking areas, and shaded and sunny spaces
  • Garden pavilions, gazebos, pergolas, fences or trellises
  • Patios, terraces, playgrounds and lawn areas
  • Trees, shrubbery and plants, including ground cover, vines, vegetables, etc.
  • Lighting (both aesthetic and functional)
  • Irrigation, rainwater harvesting systems
  • Storage sheds or areas
Step 3: List the factors that could influence your design
  • Location and zone of your property
  • Climate (snow, wind, temperature)
  • Topography of the site (characteristics of the land surface)
  • Areas of sun and shade already present
  • Soil condition (e.g., clay soil, wet, swamp, sand, etc.)
  • Drainage and irrigation
  • Existing landscaping and permanent elements already in place
  • Municipal regulations, such as height restrictions on structures or construction distances to be respected; please check your municipality’s website for more information
  • Underground infrastructure, such as pipes, aqueducts, cables, etc.
  • Any restrictions on the schedule of work; keep in mind that it is best to do most landscaping work between the months of April and November
Step 4: Have a plan drawn up
A professionally designed plan is an essential step in any landscaping project. Since it reflects your choices, a master plan helps you keep control of your project and avoid unpleasant surprises, because it gives you an overview of the final result. To help you visualize how the components of your plan will work with existing property aspects and structures, your plan will identify plant elements (trees, plants, flowers, grass), inert elements (stones, patios, structures), as well as water and lighting features. This overview will be an important reference tool to explore the possibilities available to you, and will allow you to develop the design according to your needs and budget, as well as according to the stages of development. A professional plan will help you achieve your goals and maximize the potential of your property. It can also save you money. Landscaping is often a significant investment – mistakes and misunderstandings can be expensive. A professional can help you avoid making costly mistakes.
Step 5: Look for a Certified Landscaper
Certified landscapers are recognized for their commitment to the highest standards of quality. Take the time to fully research the professional association in your area and find the right landscaper for you.

Source: Association of Professional Landscapers of Quebec (appq.org)

Grilling Beyond the Main Course

Grilling Beyond the Main Course

With spring here andsummer around the corner, we begin to enjoy the pleasu
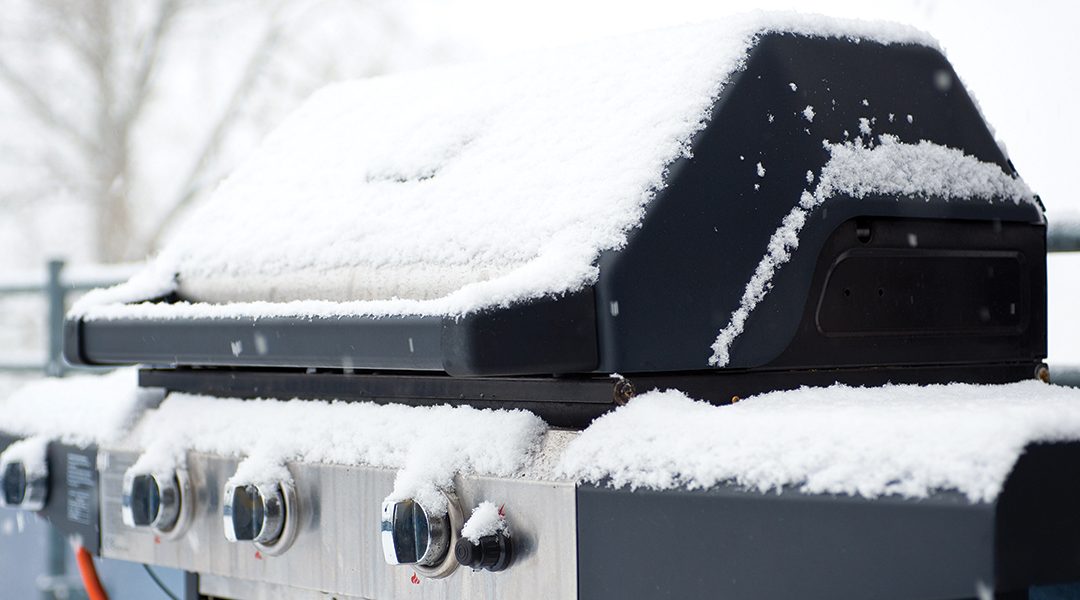
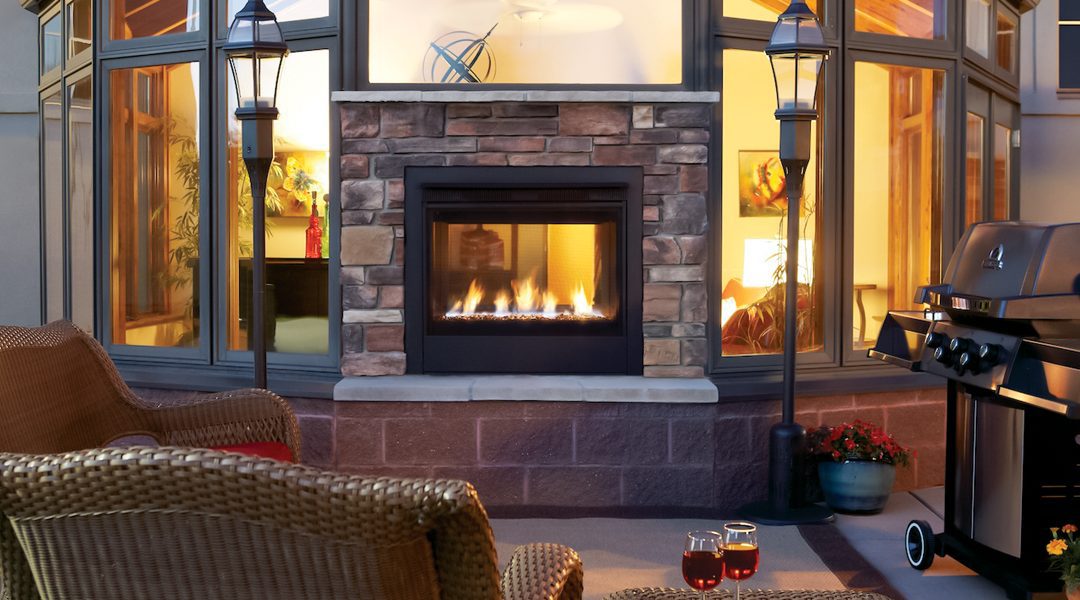
res that come with enjoying more of our outdoor spaces for the season. Whether quietly enjoying breakfast with a view, soaking up some sun over lunch, or hosting friends and family evening apps, outdoor entertaining is made simpler and more creative by exploring how to use our grill for beyond the main course!

Internationally acclaimed chef Andreas Rummel’s recent book Finger Food From The BBQ and Grill is the place to start! Published in collaboration with Napoleon Grills, and with chapter titles such as With Your Hands, On a Stick, On a Spoon, In a Roll, and With Your Fingers, you can start to guess how diverse the recipes in this book are. These amazingly creative finger food recipes take their inspiration from the vibrant street food scene and present ideas for rolls, wraps, waffles, gyros, quesadilla, hotdogs, ribs, kebabs, gyozas, tataki, wings, pancakes, pulled meats, toasted sandwiches and bruschetta, as well as salads, sauces and dips to accompany these dishes.

The recipes can make ideal starters, small snacks or form part of a multi-course menu. Each one shows how long it takes to prepare and there is a star system indicating the level of difficulty. Many recipes are easy, some are more sophisticated, but with the help of numerous tips and a little practice you will turn out success every time.

Chef Rummel, a celebrity speaker and guest chef at the 2018 Hearth, Patio & Barbecue Expo in Nashville Tennessee, graciously provided two recipes, as a preview of those available in his book.


Coppa Baskets with Melon

Makes 12
Cooking Time: 30 Minutes
Difficulty: 1 of 3 stars

Ingredients
  • 12 thin slices coppa
  • 1 cantaloupe melon
  • 1 tbsp honey
  • 1 tbsp lemon juice
  • 8 mint leaves
Preparation

Make 12 balls out of aluminum foil with a diameter of about 4 cm. Cover with a coppa to create the shape of a small bowl. Place the balls with the coppa in the barbecue and cook indirectly for 45 minutes at about 150°C (preferably on the warming rack). This will dry out the coppa and make it crispy. In the meantime, peel and de-seed the mellon. Use a vegetable peeler to shave the flesh into fine strips. Mix the honey with the lemon juice and marinate the melon in mixture for 20 minutes. Cut the mint leaves into fine strips. Take the coppa out of the barbecue and leave it to cool. Arrange uniform amounts of melon strips inside the coppa bowls and sprinkle with the mint.­­­­

Mozzarella Sticks

Makes 8-12
Cooking Time: 20 Minutes
Difficulty: 1 of 3 stars

Ingredients
  • 4 slices toasting bread
  • 1-2 mozzarella cylinders, very cold
  • ½ tsp cayenne pepper ­­­­(or Thai Seven Spice seasoning)
  • 4 bacon slices
  • 100ml barbecue sauce
Preparation

Cut the crust off the bread and roll the bread slices out flat with a rolling pin. Cut the cheese into four strips, lightly season with the cayenne pepper and roll tightly inside the bread. Gently flatten the bacon strips on a chopping board and wind one tightly around each of the bread and cheese rolls. Cook the sticks indirectly o­­­­n the barbecue with medium heat, turning several times, until the bacon is crispy. Finally, glaze the bacon with the sauce and cook for another 5 minutes with the lid open. Cut the mozzarella sticks into bite-sized pieces and serve.